

Howdy everybody!! Today we are going to talk about Annie Sloan and all of her wonderfulness!! I mean just think about all of the possibilities…and colors…and mixes…and glazes…and projects…ahhhh! She is wonderful, isn’t she?? Okay, calm down everyone, today we will focus on Annie Sloan’s Dark Wax.
My boyfriend and I are remodeling my great, great aunt’s house (yep, you saw that right, double great!) that was built sometime in the early 1900’s, I’m working on the exact date. That is a different story for a different time but is awesome, and I am so excited that we get the opportunity. As I’m told, when she passed, my grandmother inherited her dressers, which I’ve now inherited and brought back to their original home. Pretty cool, huh? Here is one of the original dressers. They’ve had their maple moment and now deserve some attention and a little renovation. It is a chance to shine in a new light!

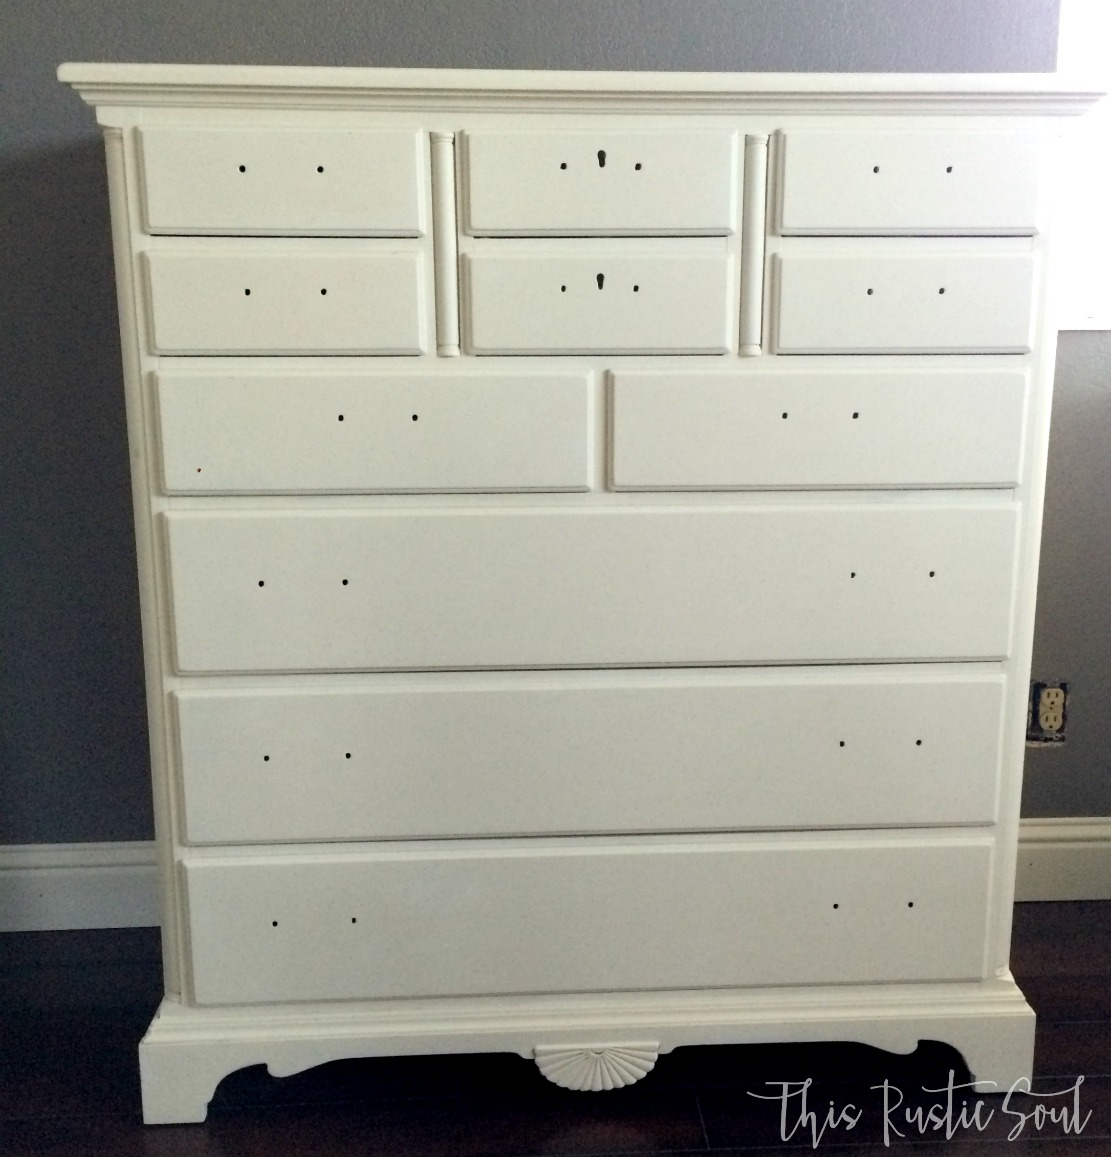
I started with Annie Sloan’s Antique White paint and applied two coats. Then I added the clear soft wax, which seals and protects the paint. Hint…you should do two coats of the clear soft wax initially, to protect your piece and let them dry for at least 24 hours.

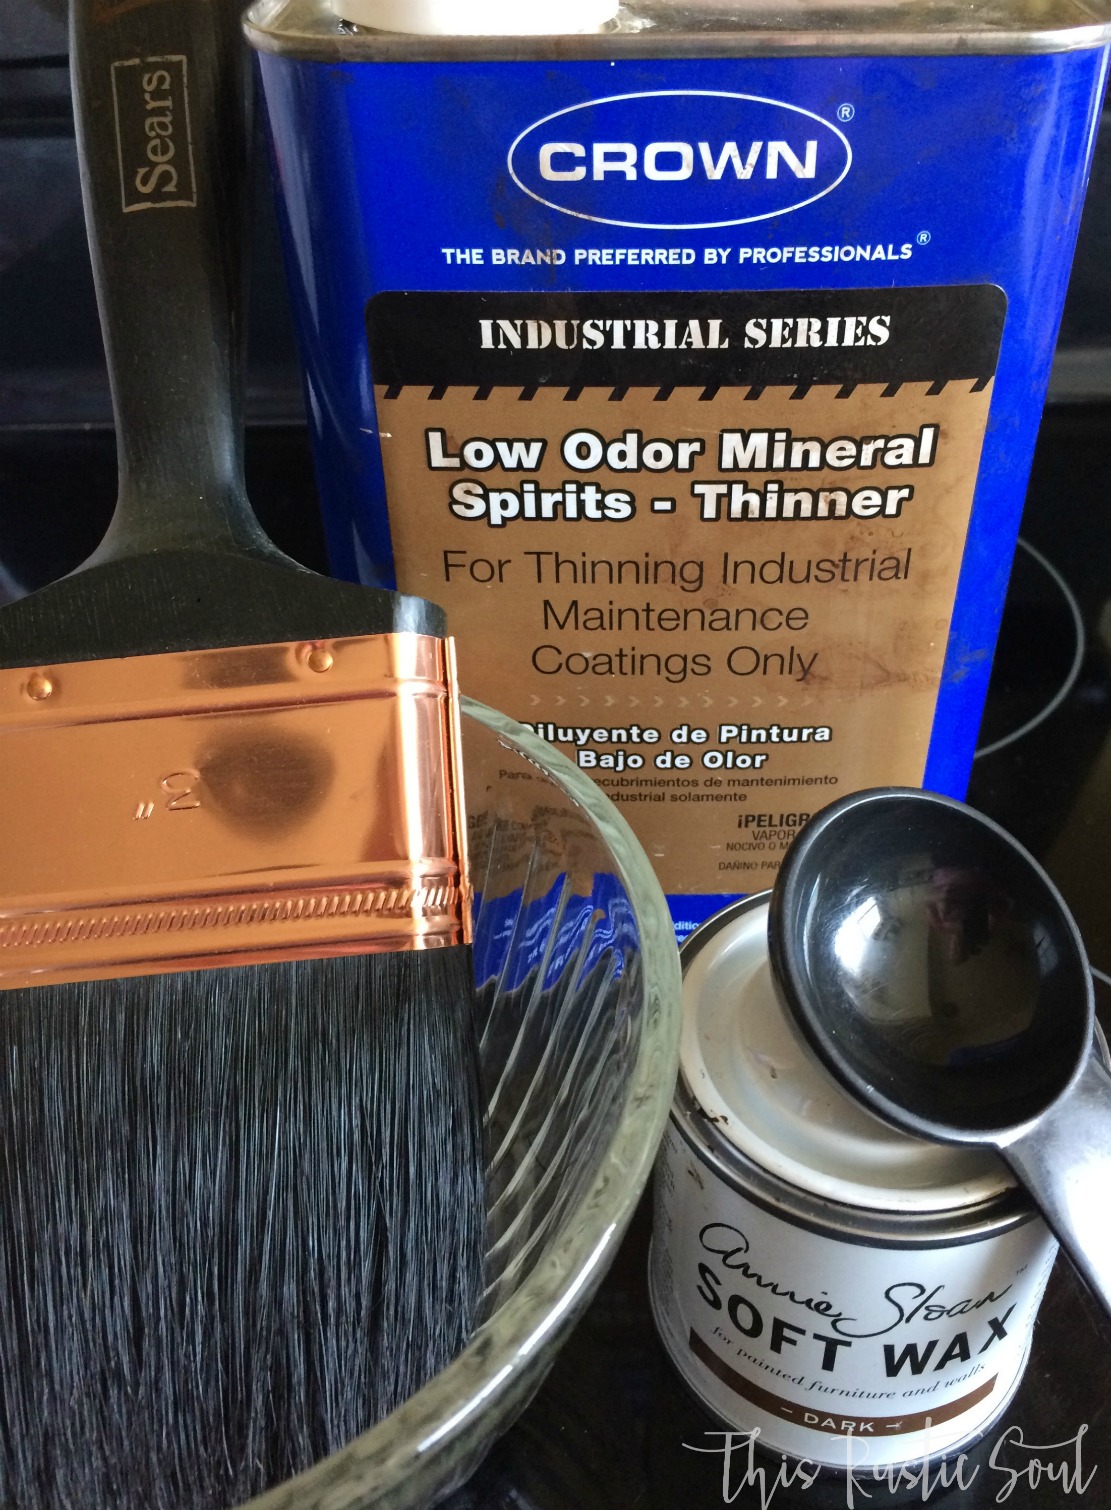
Okay guys, this is important! Make sure you buy quality brushes, not only for your painting but for waxing too. Brushes can be pricey, but if you take care of them they will last a loooooong time. My wax brush is in the photo above. I bought mine at the same local store I buy my Annie Sloan Paint, called 3 Oaks Studio in Clovis, California. If you live around the Fresno or Clovis area, this place is such a gem! The employees (who I believe are also the owners) are extremely knowledgable about all of their products and they even offer free classes. Back to the wax brush, just ask the experts at your local Annie Sloan retailer, they will point you in the right direction.
Here is the list of supplies:
- Annie Sloan’s Soft Dark Wax
- Annie Sloan’s Soft Clear Wax
- Wax Brush
- Paint Brush (oil based is best)
- Mineral Spirits
- Cheesecloth
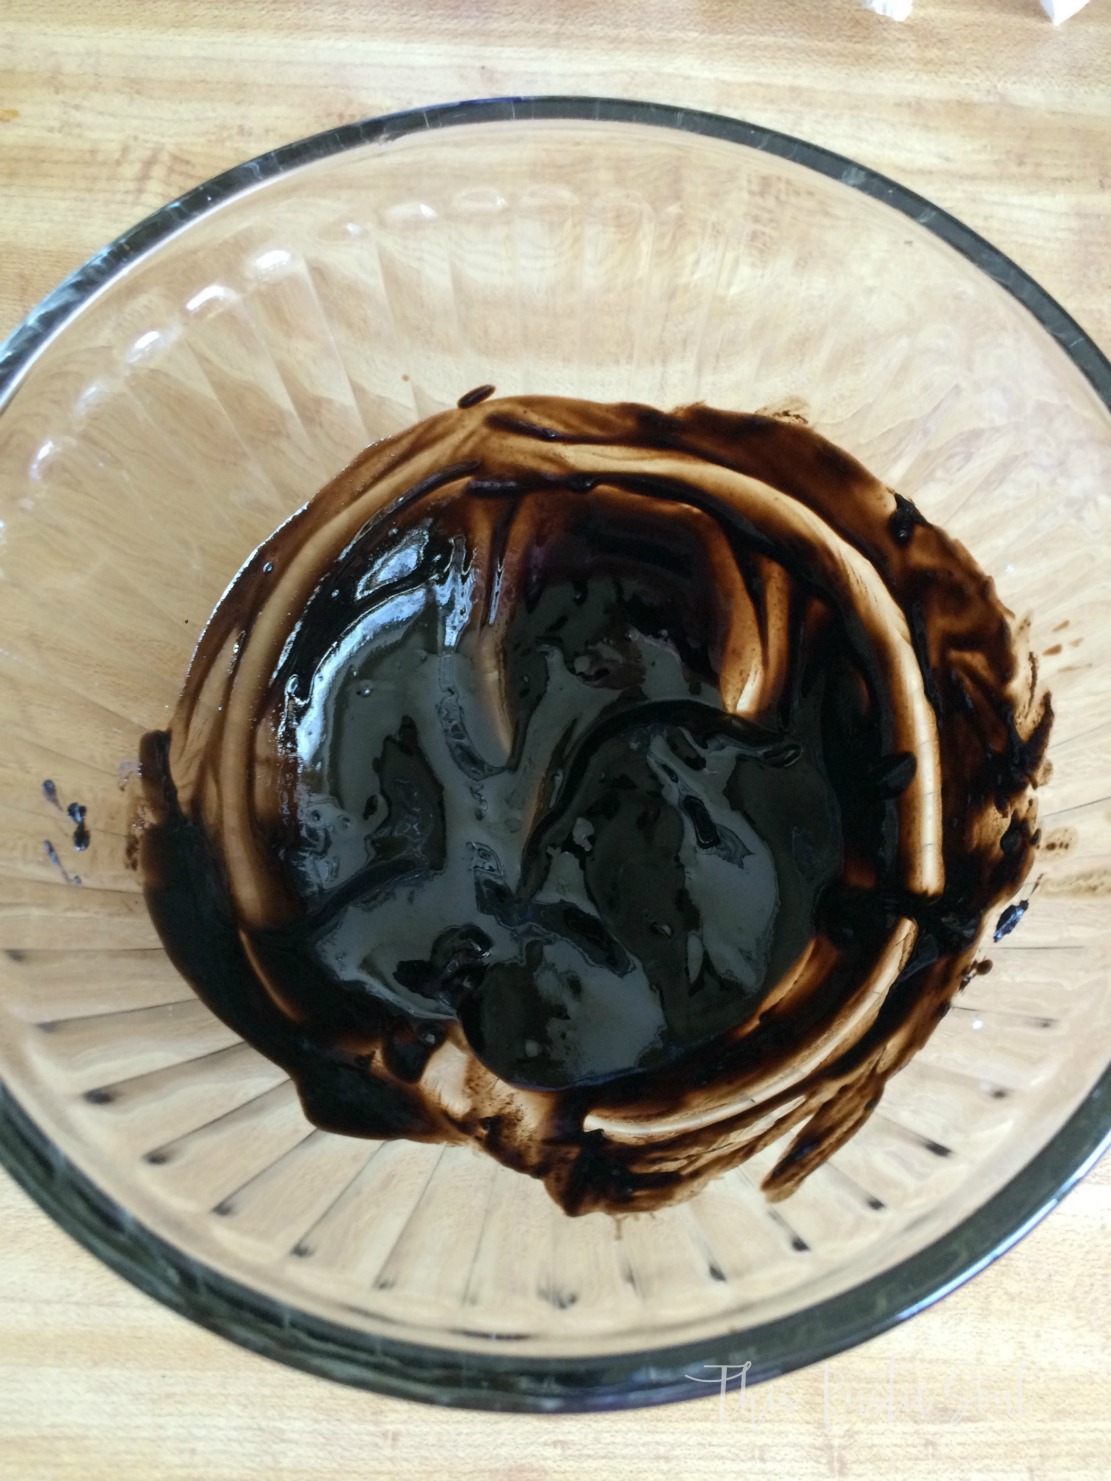
After your clear wax has had at least 24 hours to dry, it’s time to get rustic!! Or vintage, or antique, or some even say (rolling my eyes) dirty…whatever makes your artistic bird sing! The first step is mixing the dark wax into a glaze. This is SIMPLE! Just remember 1:1. One part dark wax to one part mineral spirits. To wax one dresser, I use a tablespoon as my measurement. It has always been more than enough. Now, in my opinion, this is the perfect dark glaze, but if you are a bit timid at first you can also add some of the clear wax to your glaze. The clear wax acts almost like an eraser. It will mellow down the glaze and make it easier to wipe away the excess. Another hint…since you’ve done two really great coats of the clear wax already (right???), anywhere you apply the dark glaze by mistake, or if you think it is too much in one particular spot, just throw on some clear wax and wipe it all away! It’s like magic! Annie Sloan awesome magic.
This is what the consistency of your glaze should look like.
Here is my dresser after the paint (Annie Sloan Old White) and clear wax.
To apply the glaze, I use a 3″ oil based paint brush. I like to cover a large area at once with my glaze so the 3″ works well for my needs. The oil based brush holds up a bit better than brushes made for regular, latex based paint.
Now, have your cheesecloth ready (also an old t-shirt will work in desperate times, or, I have even seen paper towels, gasp, used). Start in one area, like the side, and just go to town! Brush the glaze on a section then immediately wipe it away with your cheesecloth. Again, if it is too dark, use your wax brush loaded with some clear wax over the same section and wipe away what you don’t want. As long as you’ve done your clear wax, it is pretty forgiving. And this is all about personal style and preference! Find the look you like and go with it! Repeat this process over the entire dresser. You will get the hang of it pretty quickly. Honestly, it took me a few dressers and projects to be brave enough to get the look I like. Be brave and be daring!
Here is my final result.
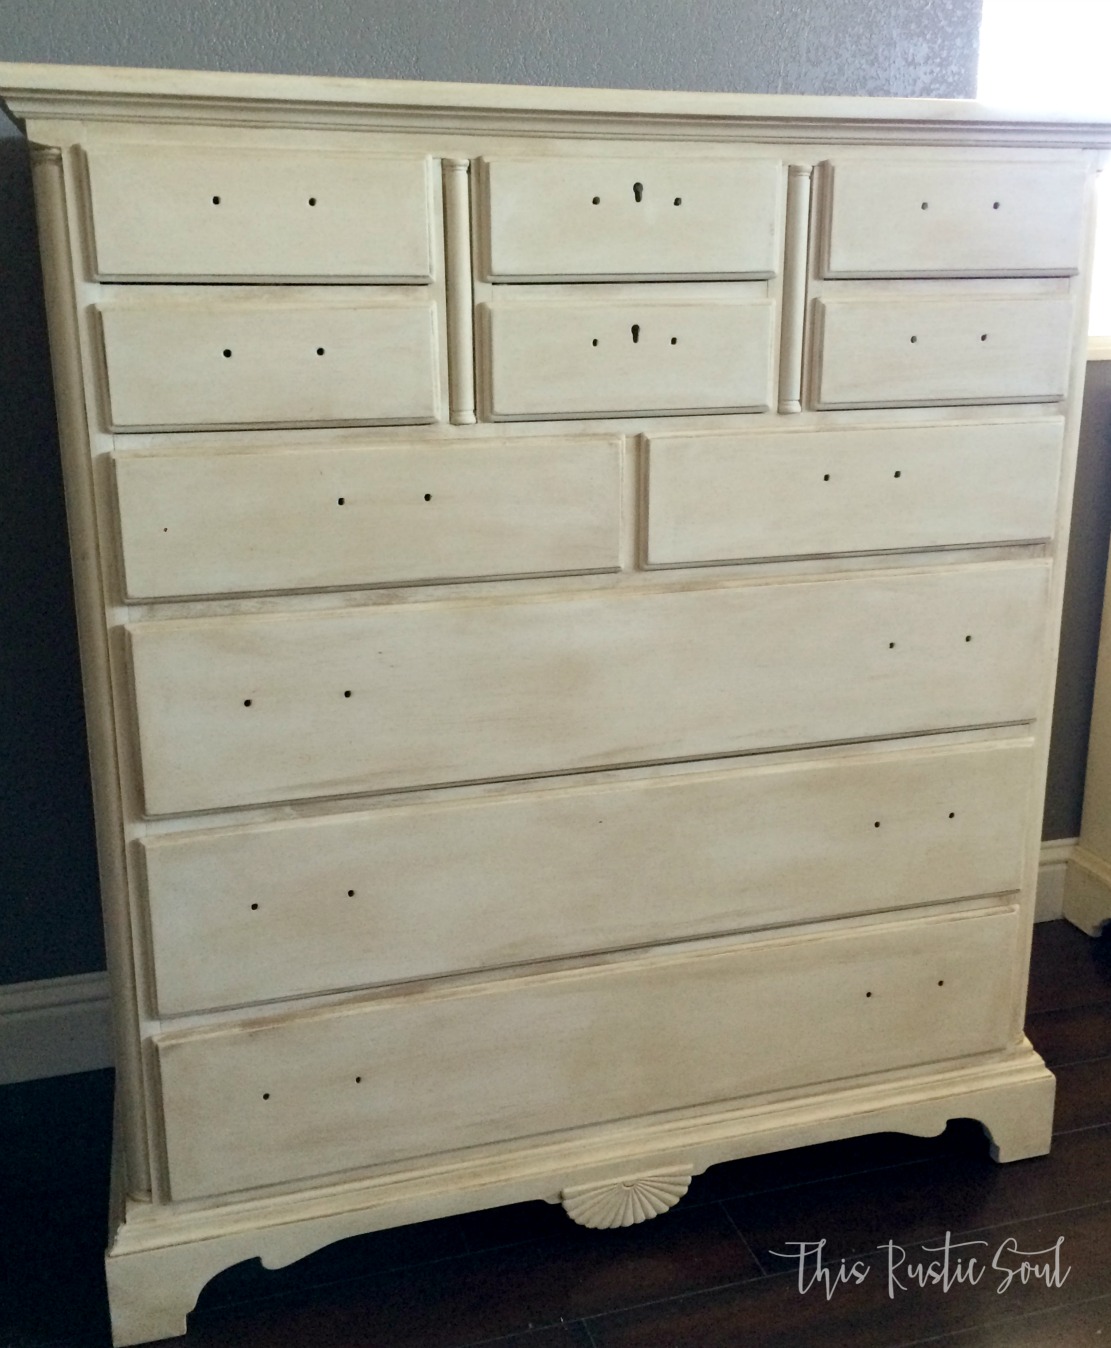
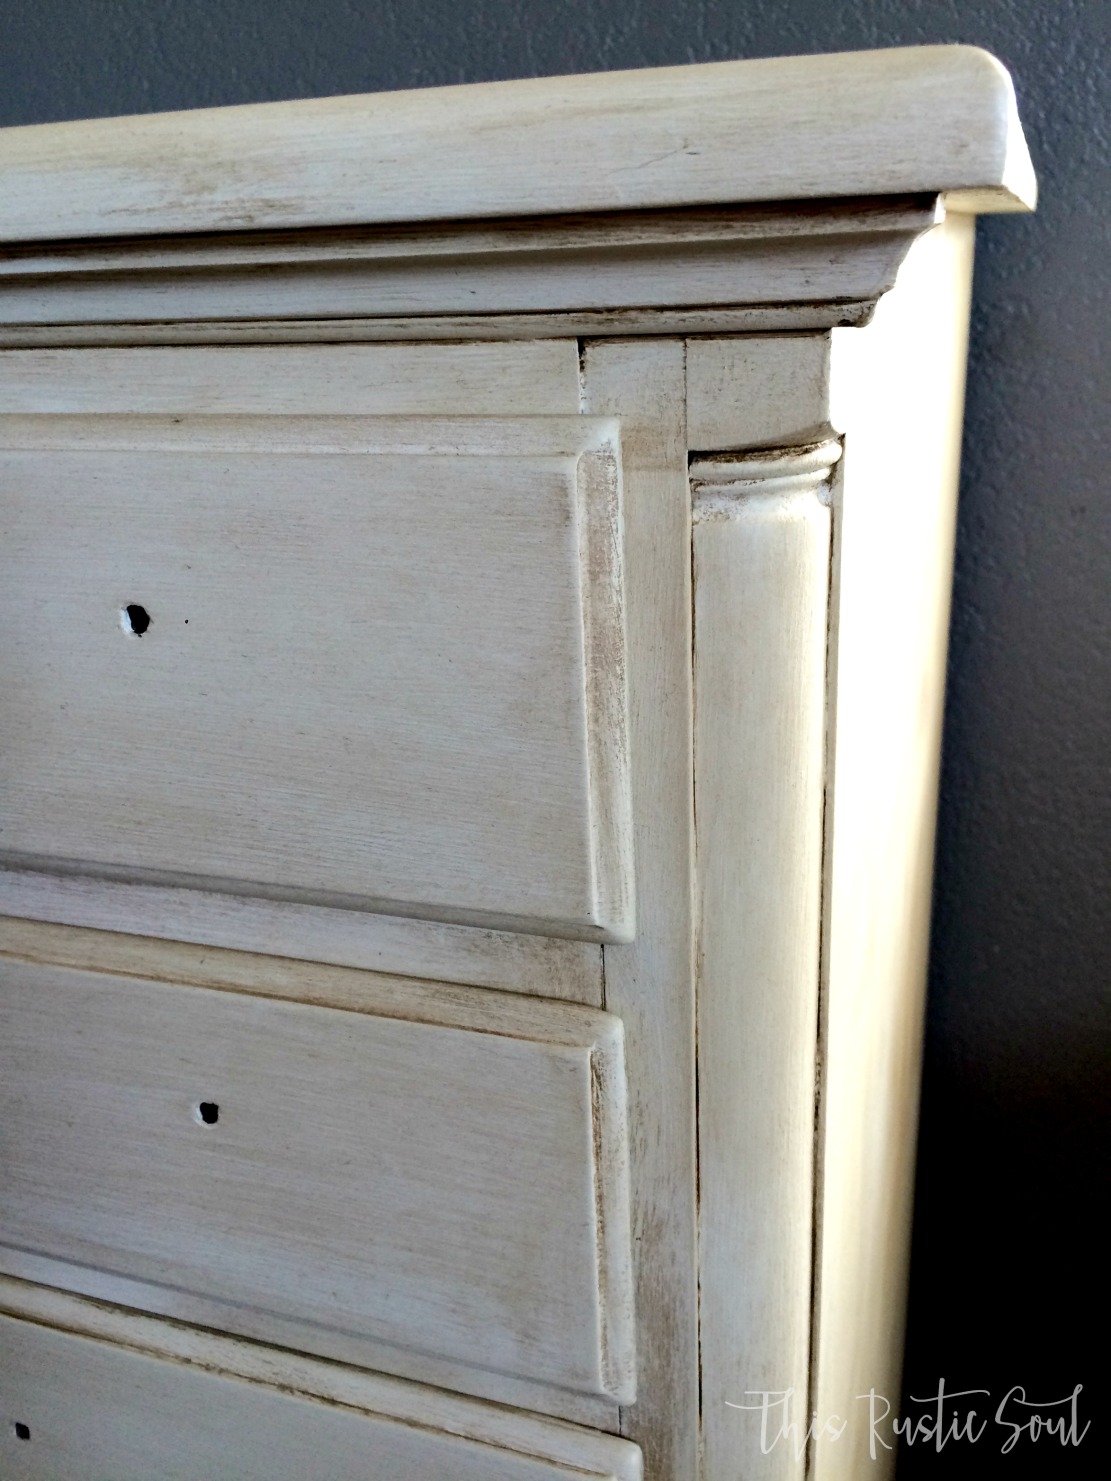
This is an up close and personal photo so that you can see the detail. The glaze really gets in all of the cracks and crevices, giving the dresser so much personality!
Now add that hardware and decorate it to make it feel at home!
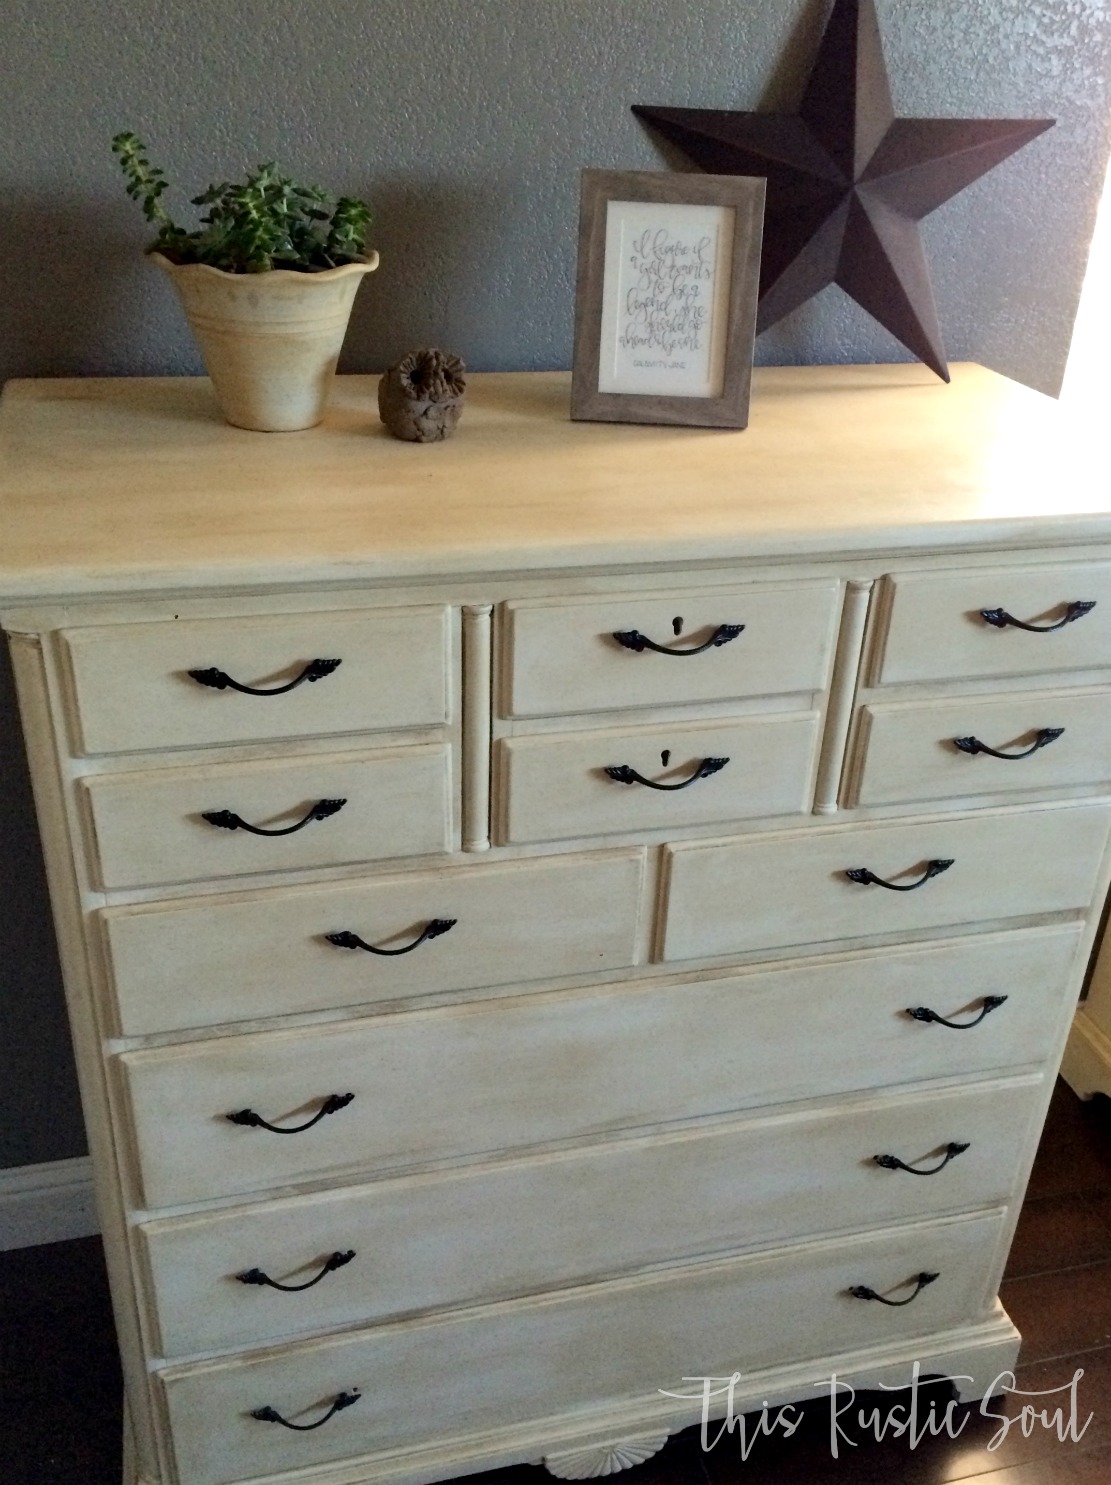

On a side note, please don’t judge my lack of outlet covers! Changing the electrical outlets and covers is one of the many jobs I’ve given my boyfriend and we all know how long those jobs can take! I would do it myself if I felt like getting electrocuted.
Also, for those of you who are like me and are the curious type, the quote in the frame is from Calamity Jane and says “I figure if a girl wants to be a legend, she should just go ahead and be one.”
Well guys, thanks for reading! I hope you’ve learned something. As always, if you have any questions or comments please feel free to share!
Karen Morris
Nini
I wanted to do my moms maple table. Would you suggest this? I love what you did to the dresser looks beautiful.
Karen
s.hoover24@hotmail.com
Karen MorrisThanks Karen! This would be super easy to do to your moms table. We could also paint the bottom and stain the top. I think that’s what Renae was thinking about doing when she was going to redo the table. Anything is possible!
Donna Foglio
So you don’t mention stripping or sanding before you start painting. I think that’s what has always kept me from tackling a project like this. If I misunderstood that please let me know. And can you do a veneer with this method?
s.hoover24@hotmail.com
Donna FoglioNope! No stripping or sanding! For me, I think that’s the best part. With Annie Sloan’s chalk paint, you can paint pretty much anything. All I do before I paint the piece is clean it with some denatured alcohol or mineral spirits. That’s it! Then just paint away! As for painting veneer, I’m sure it would be fine since you can paint metal and plastic and glass, seriously almost anything. However, make sure your veneer isn’t peeling or coming apart anywhere before you start. I hope that helps! Thanks for inquiring!